

Getting rid of mice in your walls is a two-step process. First, you need to confirm they’re actually there by looking for the classic signs like sounds, smells, and visual cues. Once you know for sure, you can move on to strategic trapping and, most importantly, sealing up every single entry point to keep them out for good.
Hearing Noises in Your Walls? The Telltale Signs of Mice
It’s often that faint scratching or scurrying sound you hear late at night—just as you’re trying to sleep—that tips you off. That’s your first clue you’re not alone.
Mice are nocturnal, so they’re most active when the house is dark and quiet. The sounds aren't just random; you're hearing the distinct noises of mice navigating the spaces between your drywall, chewing on materials, and building their nests.
But just listening isn't enough. A mouse problem leaves a trail of subtle evidence, and using your other senses is key to confirming what’s going on behind the scenes.
Beyond the Scratching: What to Look and Smell For
One of the surest signs you have mice is their droppings. They’re small, dark, and look like tiny grains of rice. You'll usually find them clustered in out-of-the-way places where mice feel secure.
Check these common hotspots:
- Behind your stove or fridge
- Under the sinks in your kitchen and bathrooms
- In the back corners of your pantry or cabinets
- Along baseboards in rooms you don’t use often
You might also notice a distinct, musty smell. This stale, ammonia-like odour comes from mouse urine and nests. It might be faint at first, but it will be much stronger in enclosed spaces like cupboards or near wall outlets connected to the infested cavities.
Also, keep an eye out for physical damage. Look for greasy smudges or rub marks along your baseboards—these are left by the oils in a mouse's fur as it runs along the same path over and over. Tiny holes chewed through drywall or into food packages are another dead giveaway.
Pro Tip: Don't underestimate your pets! If your cat or dog is suddenly obsessed with a particular spot on the wall—staring, sniffing, or pawing at it—they’re likely alerting you to activity happening just on the other side.
A Seasonal Alert for Alberta Homeowners
Here in Alberta, rodent problems definitely have a season. As soon as the weather turns cold in late autumn, mice start looking for a warm place to spend the winter, and our homes are the perfect target.
In fact, local pest management firms report that roughly 60% to 75% of all residential rodent calls happen between October and March. The peak season for complaints about mice in walls is right from November through January. Alberta’s climate literally drives them into our wall voids where it’s warm and sheltered. If you want to learn more, you can check out recent reports on regional pest pressures.
By combining what you hear, see, and smell, you can figure out pretty quickly if you're dealing with mice. Catching these early signs is the critical first step to getting them out and taking back your home.
Finding Their Highway: A Practical Guide to Locating Mouse Entry Points
To truly get rid of mice in your walls, you have to start thinking like they do. Mice don't just magically appear inside; they're masters of opportunity, slipping through the tiniest cracks and gaps in your home's exterior. Pinpointing these entry points is the single most important step in creating a permanent solution. This is how you turn your home from a cozy shelter back into a fortress.
This isn't just about finding one obvious hole and calling it a day. Mice are relentless and can squeeze through an opening the size of a dime—that's just 6 mm! A proper inspection demands a systematic, ground-up approach to identify every single vulnerability. Your goal here is to map out their little "highways" so you can shut them down for good.
Before you start the hunt outside, you first need to be sure you have an issue inside. This flowchart breaks down how to use your senses to confirm an infestation.
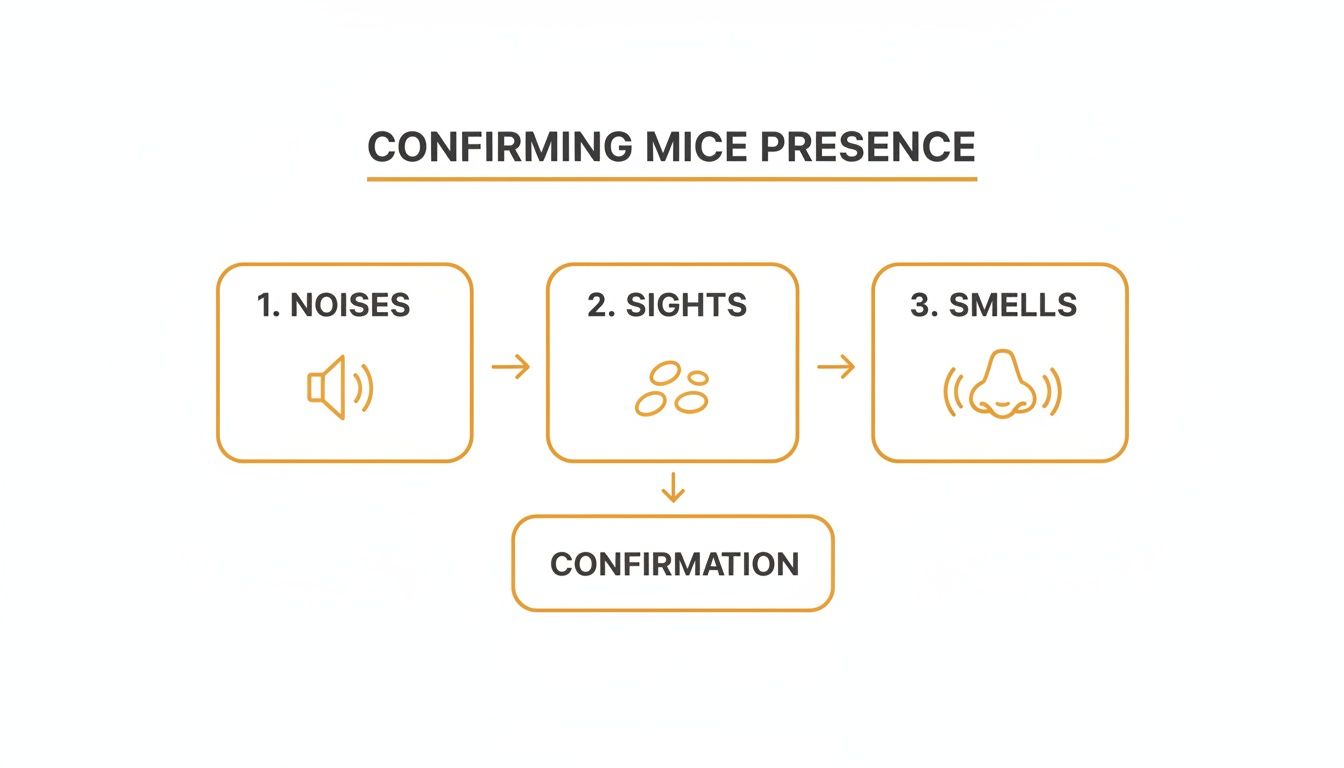
As the graphic shows, a few strange noises or smells can quickly lead to the sure signs of a mouse problem, moving you from suspicion to certainty.
Your Exterior Inspection Checklist
The best time to start your search is during the day when the light is good. Get ready to walk the entire perimeter of your house, and do it slowly. You need to look at your home from a mouse's perspective—that means getting low and looking up. Pay extremely close attention to where the foundation meets the siding; this is a prime spot for gaps to form.
Here are the high-probability areas that need your full attention:
- Utility Lines: Check where every pipe and wire enters your home—gas, electrical, water, and AC lines. The gaps around these are very often poorly sealed.
- Foundation Cracks: Scan your foundation for any fissures or cracks. Don't ignore the small ones; a mouse certainly won't.
- Siding and Trim: Look for any siding that's warped or damaged, loose corner trim, and gaps where two different building materials meet.
- Weep Holes: If you have a brick home, those small gaps left for ventilation are like an open door for mice.
- Vents and Screens: Make sure every vent—for your dryer, attic, or crawl space—is covered with a sturdy, intact screen.
A classic scenario in many Alberta homes is the small gap under the corners of a garage door. The rubber seal might look perfectly fine from a distance, but mice are experts at slipping right underneath the edges. A thorough inspection means checking every potential entry, not just the obvious ones.
Looking For Signs of Travel
While you inspect, you're not just looking for holes. You're searching for evidence that mice are actively using them. Keep an eye out for greasy, dark rub marks along walls or pipes, tiny droppings near a suspected opening, or little piles of debris that have been chewed up and pushed out of a gap.
Finding these signs is a huge win. It confirms you've found an active mouse highway, not just a random crack in the foundation. Mice are creatures of habit and will use the same routes over and over.
Common Oversights and Pro Tips
So many homeowners make the mistake of only looking for big, obvious holes. In my experience, it’s the network of tiny, overlooked gaps that causes the most persistent problems.
Don't forget to check these often-missed spots:
- Underneath Decks and Porches: These spots give mice the perfect cover to investigate your foundation for weak points without being exposed.
- Around Exterior Faucets: The opening where the spigot comes through the wall is almost always bigger than the pipe itself, leaving a perfect gap.
- The Roofline: Soffits, fascia, and roof vents can provide easy access, especially if you have overhanging tree branches creating a bridge for them.
By doing this meticulous inspection and mapping out every potential entry point, you’re laying the essential groundwork for successful removal and prevention. This detailed approach ensures that once you get the mice out, they stay out for good.
Strategic Trapping For Mice Inside Your Walls

Once you've figured out where the mice are sneaking in, it's time to deal with the ones who have already made themselves at home. Since you can't exactly put a trap inside a wall, the goal is to catch them on their daily commutes. The entire strategy boils down to intercepting them along their well-worn travel routes between their nest and their food sources.
Mice are creatures of habit. They hate open spaces and instinctively stick to the edges of rooms, using walls and baseboards for cover as they navigate. This behaviour is actually your biggest advantage when you're deciding where to set your traps.
Choosing Your Trap Location and Type
Success with trapping is all about placement. You need to put your traps right in the paths the mice are already using every day. Put yourself in their paws for a moment—where would you go for a midnight snack?
You’ll want to focus your efforts in these high-traffic mouse highways:
- Along Baseboards: Place traps perpendicular to the wall, with the business end facing the baseboard. This setup forces a curious mouse to run right over the trigger.
- Behind Appliances: The dark, warm, and hidden space behind a fridge or stove is a favourite shortcut for mice.
- Under Sinks: The gaps where plumbing pipes come through the wall are common entry points into a room, making the cabinet below a prime trapping location.
- In Hidden Corners: Check the back of your pantry, deep inside closets, or behind any furniture that's pushed up against a wall.
Now, let's talk about the traps themselves. Not all traps work the same way, and what's right for you will depend on your household—especially if you have curious pets or small children running around.
One of the most common mistakes I see is people not using enough traps. A "small" mouse problem can easily mean a dozen or more mice. For the best results, set out several traps in different high-activity spots instead of relying on just one or two.
Comparing Mouse Trap Types For In-Home Use
To effectively get rid of mice in walls, you need a trap that fits your situation. Some people prioritize a quick kill, while others are more concerned about safety for their family. Each option has its own trade-offs.
| Trap Type | Effectiveness | Safety (Pets/Kids) | Reusability | Best For |
|---|---|---|---|---|
| Snap Traps | Very High | Low | High | Quick, decisive removal in areas inaccessible to pets/children. |
| Electronic Traps | High | High | High | Safe, no-touch disposal and effective for homeowners with safety concerns. |
| Live Traps | Moderate | Very High | Very High | Humane capture, but requires checking traps frequently and releasing mice far away. |
Electronic traps are often a great middle-ground. They deliver a quick, humane shock and keep the mouse contained inside, which makes for clean and simple disposal. Live traps are a humane choice, but you have to check them constantly and be prepared to drive the mouse a good distance away. Plus, relocation might not always be permitted by local bylaws, so it's good to check first.
The Art of Baiting and Safe Handling
Forget what you see in cartoons—cheese isn't the best bait. Mice are much more attracted to high-protein, sticky foods that they can't just lick off the trigger without setting off the trap.
Try using baits like these for better results:
- Peanut butter (it's a classic for a reason)
- Hazelnut spread
- A tiny piece of bacon or beef jerky
- Dental floss or cotton (they'll try to steal it for nesting material)
Always wear gloves when you’re baiting and setting your traps. Mice have an excellent sense of smell and can be put off by human scent. Similarly, understanding how to deal with other common household pests is key to protecting your home; for instance, you can learn how to effectively get rid of carpet moths with proven strategies.
When you do catch one, safe handling is critical. Keep your gloves on and never touch the rodent directly. For snap or electronic traps, place the mouse and the trap into a plastic bag, seal it up, and throw it in your outdoor garbage bin. If you've used a live trap, you need to release the mouse at least 3 kilometres from your home to make sure it doesn't just turn around and come right back.
Fortifying Your Home: Sealing Entry Points to Prevent Future Infestations

Trapping the mice you have now is a great start, but it only solves half the problem. If you don't shut down the highways they used to get inside, a new family of rodents will eventually move right in. This is where exclusion comes in—it’s the permanent fix for keeping mice out for good.
Think of it less like patching a few holes and more like building a fortress. By systematically sealing every potential entry point you found earlier, you’re making your home impenetrable. This is without a doubt the most important step if you want to make sure you never hear that awful scratching in your walls again.
Choosing the Right Materials for the Job
When it comes to mouse-proofing, not all materials are created equal. Mice have surprisingly strong teeth and will chew right through common fillers like wood, plastic, rubber, and cheap sealants. You need materials that can stand up to their constant gnawing.
Your rodent-proofing toolkit should include:
- Steel Wool: This is your secret weapon. Mice absolutely cannot chew through the coarse metal fibres, making it a perfect filler for small-to-medium gaps.
- High-Quality Caulk or Sealant: Don't just stuff a hole and walk away. Use a durable, weather-resistant caulk over the steel wool to lock it in place and block drafts.
- Wire Mesh: For larger openings like vents or bigger foundation cracks, use a sturdy hardware cloth or wire mesh with openings no larger than 6 mm.
- Metal Flashing: Thin sheets of metal are great for patching up larger holes in siding or around the base of your home where damage might have occurred.
Using these materials together creates a barrier that even the most determined mouse can't get through.
A Common Mistake to Avoid
So many homeowners grab a can of expanding spray foam to fill gaps, thinking it’s a quick fix. Unfortunately, this is one of the biggest mistakes you can make. Mice will chew straight through hardened spray foam like it's cheese. Using it by itself is basically putting up a welcome sign.
Pro Tip: The best method is to pack the gap tightly with steel wool first, then seal over the top with a high-quality silicone or polyurethane caulk. This creates a double-layer defence that's both chew-proof and airtight.
Your Action Plan for Sealing Up
With your materials ready, it’s time to go back to that list of entry points you made during your inspection. Work your way around the outside of your home and tackle each vulnerability one by one.
Be sure to focus on sealing these key areas:
- Gaps around utility lines: Pack steel wool tightly into the space around every pipe, wire, and conduit before you seal it.
- Cracks in the foundation: Small cracks can be filled with a durable masonry sealant. Anything larger should be backed with wire mesh first.
- Vents and weep holes: Securely fasten wire mesh over dryer, attic, or crawl space vents. You can find special weep hole covers that allow ventilation but block pests.
Going beyond just sealing cracks can make a huge difference, too. For instance, a deeper understanding the benefits of duct sealing can show you how to stop pests from using your HVAC system as their personal subway. A well-sealed home is a pest-free home.
Taking the time to do this sealing work is a powerful investment in your peace of mind. For more specific advice, our guide on DIY pest prevention tips for Red Deer offers strategies tailored to Alberta homes. This final step is what will get rid of the mice in your walls and keep them out permanently.
The Aftermath: Safe Cleanup and Why It's So Important
So, the traps are empty and the scratching in the walls has finally gone silent. It’s tempting to breathe a sigh of relief and call the job done, but hold on. What the mice left behind is a serious, and often invisible, threat to your family's health.
The cleanup phase isn't just about making things look tidy again. It's a critical safety measure to get your home back to a healthy state. Mice contaminate every single surface they scurry across, and their droppings, urine, and nesting materials can be packed with dangerous pathogens. This is especially true when an infestation has been brewing inside your walls, allowing waste to pile up unseen for who knows how long.
Gearing Up Before You Start
Before you even think about touching a single dropping, you need to protect yourself. The main goal here is twofold: avoid direct contact with any of the contaminants and, just as importantly, stop yourself from kicking them up into the air where you can breathe them in. This is definitely not a job for your everyday cleaning gear.
Your essential safety kit should include:
- Rubber, latex, or vinyl gloves: This creates a solid barrier between your skin and any hazardous materials.
- An N95-rated respirator or mask: This is non-negotiable. It protects your lungs from airborne nasties.
- Goggles: A good pair will shield your eyes from any accidental splashes of disinfectant or contaminated dust.
Don't forget about proper ventilation, either. Open up the windows and doors in the area for at least 30 minutes before you start cleaning and keep them open the entire time. This helps to air out the space and dilute any particles floating around.
How to Disinfect Contaminated Areas the Right Way
The single biggest mistake I see homeowners make is grabbing a broom or vacuum to deal with dry droppings. This is the worst thing you can do. It launches microscopic particles, potentially carrying viruses like Hantavirus, straight into the air, creating a massive inhalation risk. You have to wet everything down first.
Start by mixing up a good disinfecting solution. You don't need anything fancy; a simple mix of 1 part bleach to 10 parts water is incredibly effective. If you'd rather use a store-bought disinfectant, just make sure the label says it kills viruses.
Thoroughly soak all visible droppings, nests, and urine stains with your disinfectant. Let it sit for a good five minutes. This gives the solution time to neutralize the pathogens before you try to wipe anything up. Don't rush this step—it's the most important part of a safe cleanup.
Using paper towels, wipe up the saturated mess and pop it all straight into a heavy-duty garbage bag. After an area is clear of the visible gunk, grab a fresh paper towel, spray more disinfectant, and wipe down the entire surface—baseboards, shelves, floors, everything.
The cost of an in-wall infestation goes way beyond just cleanup supplies. Here in central Alberta, mice nesting in wall cavities can do some serious damage. Repair costs can easily range from CAD 400 to over CAD 3,000, especially for things like replacing gnawed electrical wiring or contaminated insulation. As you can find in industry reports on the impact of rodents, these costs show just how important it is to get on top of a mice-in-walls problem fast.
Once you’re done, put your dirty paper towels, used gloves, and mask into the same garbage bag. Seal it up tightly and get it into an outdoor bin right away. Job done, and done safely.
When to Call a Professional for Your Mouse Problem
Trying to tackle a mouse problem on your own can be a good first step, but there are definitely times when DIY methods just aren't cutting it. Knowing when to throw in the towel and call for backup is key to protecting your home and your peace of mind. If you feel like you're fighting a losing battle, it's probably time to bring in an expert.
The most obvious red flag is persistent activity. You’re setting traps, you’re checking them, but you’re still finding fresh droppings every morning. You’re still hearing that telltale scratching in the walls at night. If the evidence keeps piling up despite your best efforts, the mouse population is likely growing faster than you can trap them.
Signs You Need an Expert
Some situations are clear signals that the infestation is much more serious than it looks on the surface. These are the moments when professional-grade tools and experience become necessary.
- Daytime Sightings: Mice are nocturnal creatures. If you spot one scurrying across your floor during the day, it's a bad sign. It often means the nests are so overcrowded that mice are being forced out to find food and water—a sure indicator of a large-scale infestation.
- Widespread Evidence: Finding droppings and other signs of mice in multiple rooms or on different floors? This suggests they aren't just in one spot. They've likely set up several nests throughout your home.
- Failed Exclusion Attempts: You've sealed every crack and crevice you could find, but somehow, they just keep getting back in. A professional can spot the hidden, hard-to-reach entry points you might have missed.
A professional technician brings a lot more to the table than just stronger products. They have the experience to quickly figure out how bad the infestation really is, identify all the ways mice are getting in, and build a targeted plan that gets real results.
The Value of Professional Pest Control
When you're dealing with a stubborn mouse problem, calling an expert actually saves you time, stress, and money in the long run. A professional service doesn't just treat the symptoms; it gets to the root of the problem, from removal and exclusion to future prevention.
They use specialized tools to map out how rodents are moving inside your walls and deploy safe, effective strategies that are far more advanced than what you can buy at the store. This comprehensive approach ensures every mouse is removed, not just the few that happen to stumble into your traps.
By investing in expert help, you get a definitive end to the problem. If you’re ready for a guaranteed solution to your mouse troubles, explore our professional pest management services for a complete and lasting fix.
Frequently Asked Questions About Mice in Walls
Even when you have a solid game plan, it's natural to have lingering questions when dealing with mice you can hear but can't see. It's an unnerving situation, and we get these questions from homeowners across Alberta all the time. Here are some straightforward answers to the most common ones.
Can Mice in My Walls Leave on Their Own?
It’s a nice thought, but the reality is almost certainly no. Once a family of mice has found a warm, sheltered spot like your wall voids—completely safe from predators and the brutal Alberta winter—they have absolutely no reason to pack up and leave.
Your walls provide the perfect home base, with easy, hidden pathways to food and water elsewhere in your house. Simply waiting for them to move on is a losing game. A single pair of mice can have dozens of offspring in just one year, turning a minor issue into a major infestation before you know it.
Is It Safe to Use Poison for Mice Inside Walls?
As professionals, we strongly advise against using rodenticides (poisons) inside wall cavities. It might feel like a quick fix, but it often creates a far worse, and far smellier, problem.
A poisoned mouse won't die out in the open. It will retreat to its nest deep within your walls and die there. This leads to a truly horrific odour that can linger for weeks, sometimes months, as the carcass decomposes in an area you can't reach. Worse yet, it can attract a whole new wave of pests like flies and carrion beetles, creating a secondary infestation. Trapping is a much smarter approach because it lets you physically remove the problem.
Key Takeaway: The goal isn't just to kill the mice; it's to get them out of your home. Poison makes removal impossible and almost always leads to new issues that are harder to solve than the original one.
How Do I Know for Sure if All the Mice Are Gone?
Knowing you've won the battle requires a bit of patience and detective work. The most reliable sign of success is a complete lack of any new mouse activity for at least two to three weeks.
Here’s your victory checklist:
- No New Droppings: This is your number one clue. Check your known hotspots every single day.
- Sweet, Sweet Silence: The scratching, scurrying, and squeaking noises that kept you up at night should be totally gone.
- No Fresh Gnaw Marks: Give a quick look at food packages, baseboards, and wiring for any new damage.
Once you're confident the coast is clear, remember that all the exclusion work you did is what will keep them out for good.
If you have more pest-related questions, we've compiled a ton of information in our extensive FAQ section.
When DIY methods just aren't cutting it, trust the professionals to protect your home. Dragon Pest Control offers guaranteed solutions to remove mice and keep them from coming back. Request your free quote today
Article created using Outrank